Goals
- Maven-friendly Eclipse project
- easy development using Eclipse and WTP
- ability to build the entire project using Maven (eg. for deployment or nightly builds)
If you want to skip the 'boring' step-by-step explanation, simply check out the project from SVN :)
Requirements
The followings should be installed and configured properly:
- Eclipse 3.5 with WTP (eg. the default Eclipse IDE for Java EE Developers)
- M2Eclipse plugin for Eclipse
- Maven 2.2.x
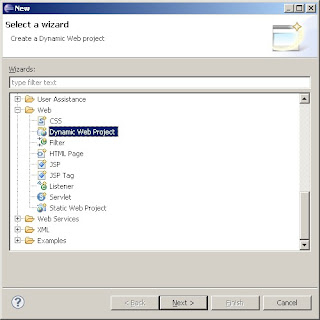
- create a new Dynamic Web Project
- change the source folder to src/main/java and the output folder to target/classes

- change the content directory to src/main/webapp


Setup Maven support
Create a pom.xml file with a basic content:
<project xmlns="http://maven.apache.org/POM/4.0.0" xmlns:xsi="http://www.w3.org/2001/XMLSchema-instance"
    xsi:schemaLocation="http://maven.apache.org/POM/4.0.0 http://maven.apache.org/maven-v4_0_0.xsd">
    <modelVersion>4.0.0</modelVersion>

    <properties>
        <project.build.sourceEncoding>UTF-8</project.build.sourceEncoding>
    </properties>

    <groupId>com.jvminside.blog</groupId>
    <artifactId>gwt-eclipse-maven-webapp</artifactId>
    <version>1.0.0-SNAPSHOT</version>
    <packaging>war</packaging>

    <build>
        <finalName>gwtapp</finalName>
        <plugins>
            <plugin>
                <groupId>org.apache.maven.plugins</groupId>
                <artifactId>maven-resources-plugin</artifactId>
                <version>2.4.1</version>
                <configuration>
                    <encoding>UTF-8</encoding>
                </configuration>
            </plugin>
            <plugin>
                <groupId>org.apache.maven.plugins</groupId>
                <artifactId>maven-compiler-plugin</artifactId>
                <version>2.1</version>
                <configuration>
                    <source>1.6</source>
                    <target>1.6</target>
                    <encoding>UTF-8</encoding>
                </configuration>
            </plugin>
        </plugins>
    </build>

</project>
Enable Maven Dependency Management in the context menu of the project:

From now on M2Eclipse manages our Maven dependencies by maintaning a dynamic Eclipse library dependency based on the pom.xml file:

Add the GWT dependencies
Add the gwtVersion property to the properties section of the pom.xml:
<properties>
    ...
    <gwtVersion>2.0.0</gwtVersion>
</properties>
Add the GWT user and dev library dependencies:
<dependencies>
    <dependency>
        <groupId>com.google.gwt</groupId>
        <artifactId>gwt-user</artifactId>
        <version>${gwtVersion}</version>
        <scope>provided</scope>
    </dependency>
    <dependency>
        <groupId>com.google.gwt</groupId>
        <artifactId>gwt-dev</artifactId>
        <version>${gwtVersion}</version>
        <scope>provided</scope>
    </dependency>
</dependencies>
(Starting with GWT 2.0 the dev library is platform-independent. Older GWT versions had platform-specific dev library, so it required much more configuration to setup a portable build.)
The newly added dependencies are automatically added to the build path:

Now we can implement our application - which simply displays a message alert :). See the source code of the GWT module XML, the application class and the HTML host file in the SVN repository.
GWT-Maven integration
During GWT compilation the Java source files of the client-side code must be available on the classpath for the GWT compiler. The easiest solution is to mark the entire src/main/java folder as a resource folder, so Maven will copy all Java files to the target/classes directory during the process-resources lifecycle phase:
<build>
    ...
    <resources>
        <resource>
            <directory>src/main/java</directory>
        </resource>
    </resources>
</build>
So, the Java source files are copied during a Maven build, but what about Eclipse builds? Fortunatelly M2Eclipse handles this as well because it executes process-resources on resource changes. This is configured in the project settings:

We use the maven-gwt-plugin to do the rest of the GWT integration:
<build>
    ...
    <plugins>
        ...
        <plugin>
            <groupId>org.codehaus.mojo</groupId>
            <artifactId>gwt-maven-plugin</artifactId>
            <version>1.2</version>
            <configuration>
                <module>com.jvminside.blog.gwtapp.GwtApp</module>
                <enableAssertions>true</enableAssertions>
                <gwtVersion>${gwtVersion}</gwtVersion>
                <runTarget>/gwtapp/index.html</runTarget>
                <noServer>true</noServer>
                <port>40000</port>
                <debugPort>9008</debugPort>
                <inplace>true</inplace>
                <extra>${project.build.directory}/gwt-extra</extra>
                <gen>${project.build.directory}/gwt-gen</gen>
                <extraJvmArgs>-Xmx256m -Xss16m</extraJvmArgs>
                <webappDirectory>${project.build.directory}/${project.build.finalName}</webappDirectory>
                <warSourceDirectory>${project.build.directory}/${project.build.finalName}</warSourceDirectory>
            </configuration>
            <executions>
                <execution>
                    <id>gwt-compile</id>
                    <goals>
                        <goal>compile</goal>
                    </goals>
                    <phase>process-classes</phase>
                </execution>
            </executions>
        </plugin>
    </plugins>
</build>
The key settings are:
- noServer is set to true because we will use a standalone Tomcat to run the web application (instead of GWT's built-in servlet container)
- the GWT files are compiled to target/gwtapp (gwtapp is the finalName of the project)
- GWT compilation is performed in the process-classes phase
We can now compile the GWT application by executing mvn process-classes. We must do this at least once to generate the hosted.html file which is necessary to run the application in devmode.
GWT-WTP integration
If we deploy and run the application at this point, it won't work because the resources of the web application are at two separate locations:
- static resources in src/main/webapp
- generated GWT resources in target/gwtapp/gwt
The related settings are stored in the .settings/org.eclipse.wst.common.component file, let's add our other content directory to it:
<?xml version="1.0" encoding="UTF-8"?>
<project-modules id="moduleCoreId" project-version="1.5.0">
    <wb-module deploy-name="jvminside-gwt-eclipse-maven-integration">
        <wb-resource deploy-path="/" source-path="/src/main/webapp"/>
        <wb-resource deploy-path="/" source-path="/target/gwtapp"/>
        <wb-resource deploy-path="/WEB-INF/classes" source-path="/src/main/java"/>
        <property name="context-root" value="gwtapp"/>
        <property name="java-output-path"/>
    </wb-module>
</project-modules>
If we deploy the application now, it works as expected!

Eclipse launch configurations for DevMode
After the project is built with mvn process-classes, it is very easy to run it in devmode from the command line, simply execute mvn gwt:run.
Debugging is almost as easy, execute mvn gwt:debug, then connect to the process with Eclipse's remote debugging option.
There are 3 launch configurations in the project which do just these:

Building a WAR file
Execute mvn package, that's it.
Future features
Nothing is perfect for everything, this project could be enhanced further - depending on your needs, for example:
- integration with the Google Eclipse Plugin (let's wait with this until some Maven support is added to the plugin)
- creating an archetype if you need to create many projects
- etc.


You could also use the gwt archetype from the codehaus mojo plugin for maven. Quite a bit easier IMHO
ReplyDeleteI agree, this post may be more useful if someone wants to understand the steps to create the integration.
ReplyDeleteNice Information Sharing Thanks
ReplyDeleteWeb Application Development
These are some of the common web application development solutions we provide Web 2.0, Community and Networking Applications Effective and easy-to-use user
ReplyDeleteWeb Application Development